Potato Print Art DIY.

Art DIY5.jpg
Art DIY8.jpg
Art DIY4.jpg
Art DIY10.jpg
Art DIY7.jpg

Art DIY12.jpg
Art DIY13.jpg
Art DIY14.jpg

I found this Rebecca Atwood DIY on Emily Henderson's site over a year ago. I think Rebecca's work is phenomenal and was blown away with how Emily styled it just so magnificently. The more I thought about it, the more enamored I became with the way that you could tailor this kind of art to however you like - it's really so simple! Potato printing has been around a long time, and there are infinite ways that you can express yourself using potatoes as your stamp!

Supplies Needed:
- a canvas (I grabbed a massive one on sale at Michael's!)
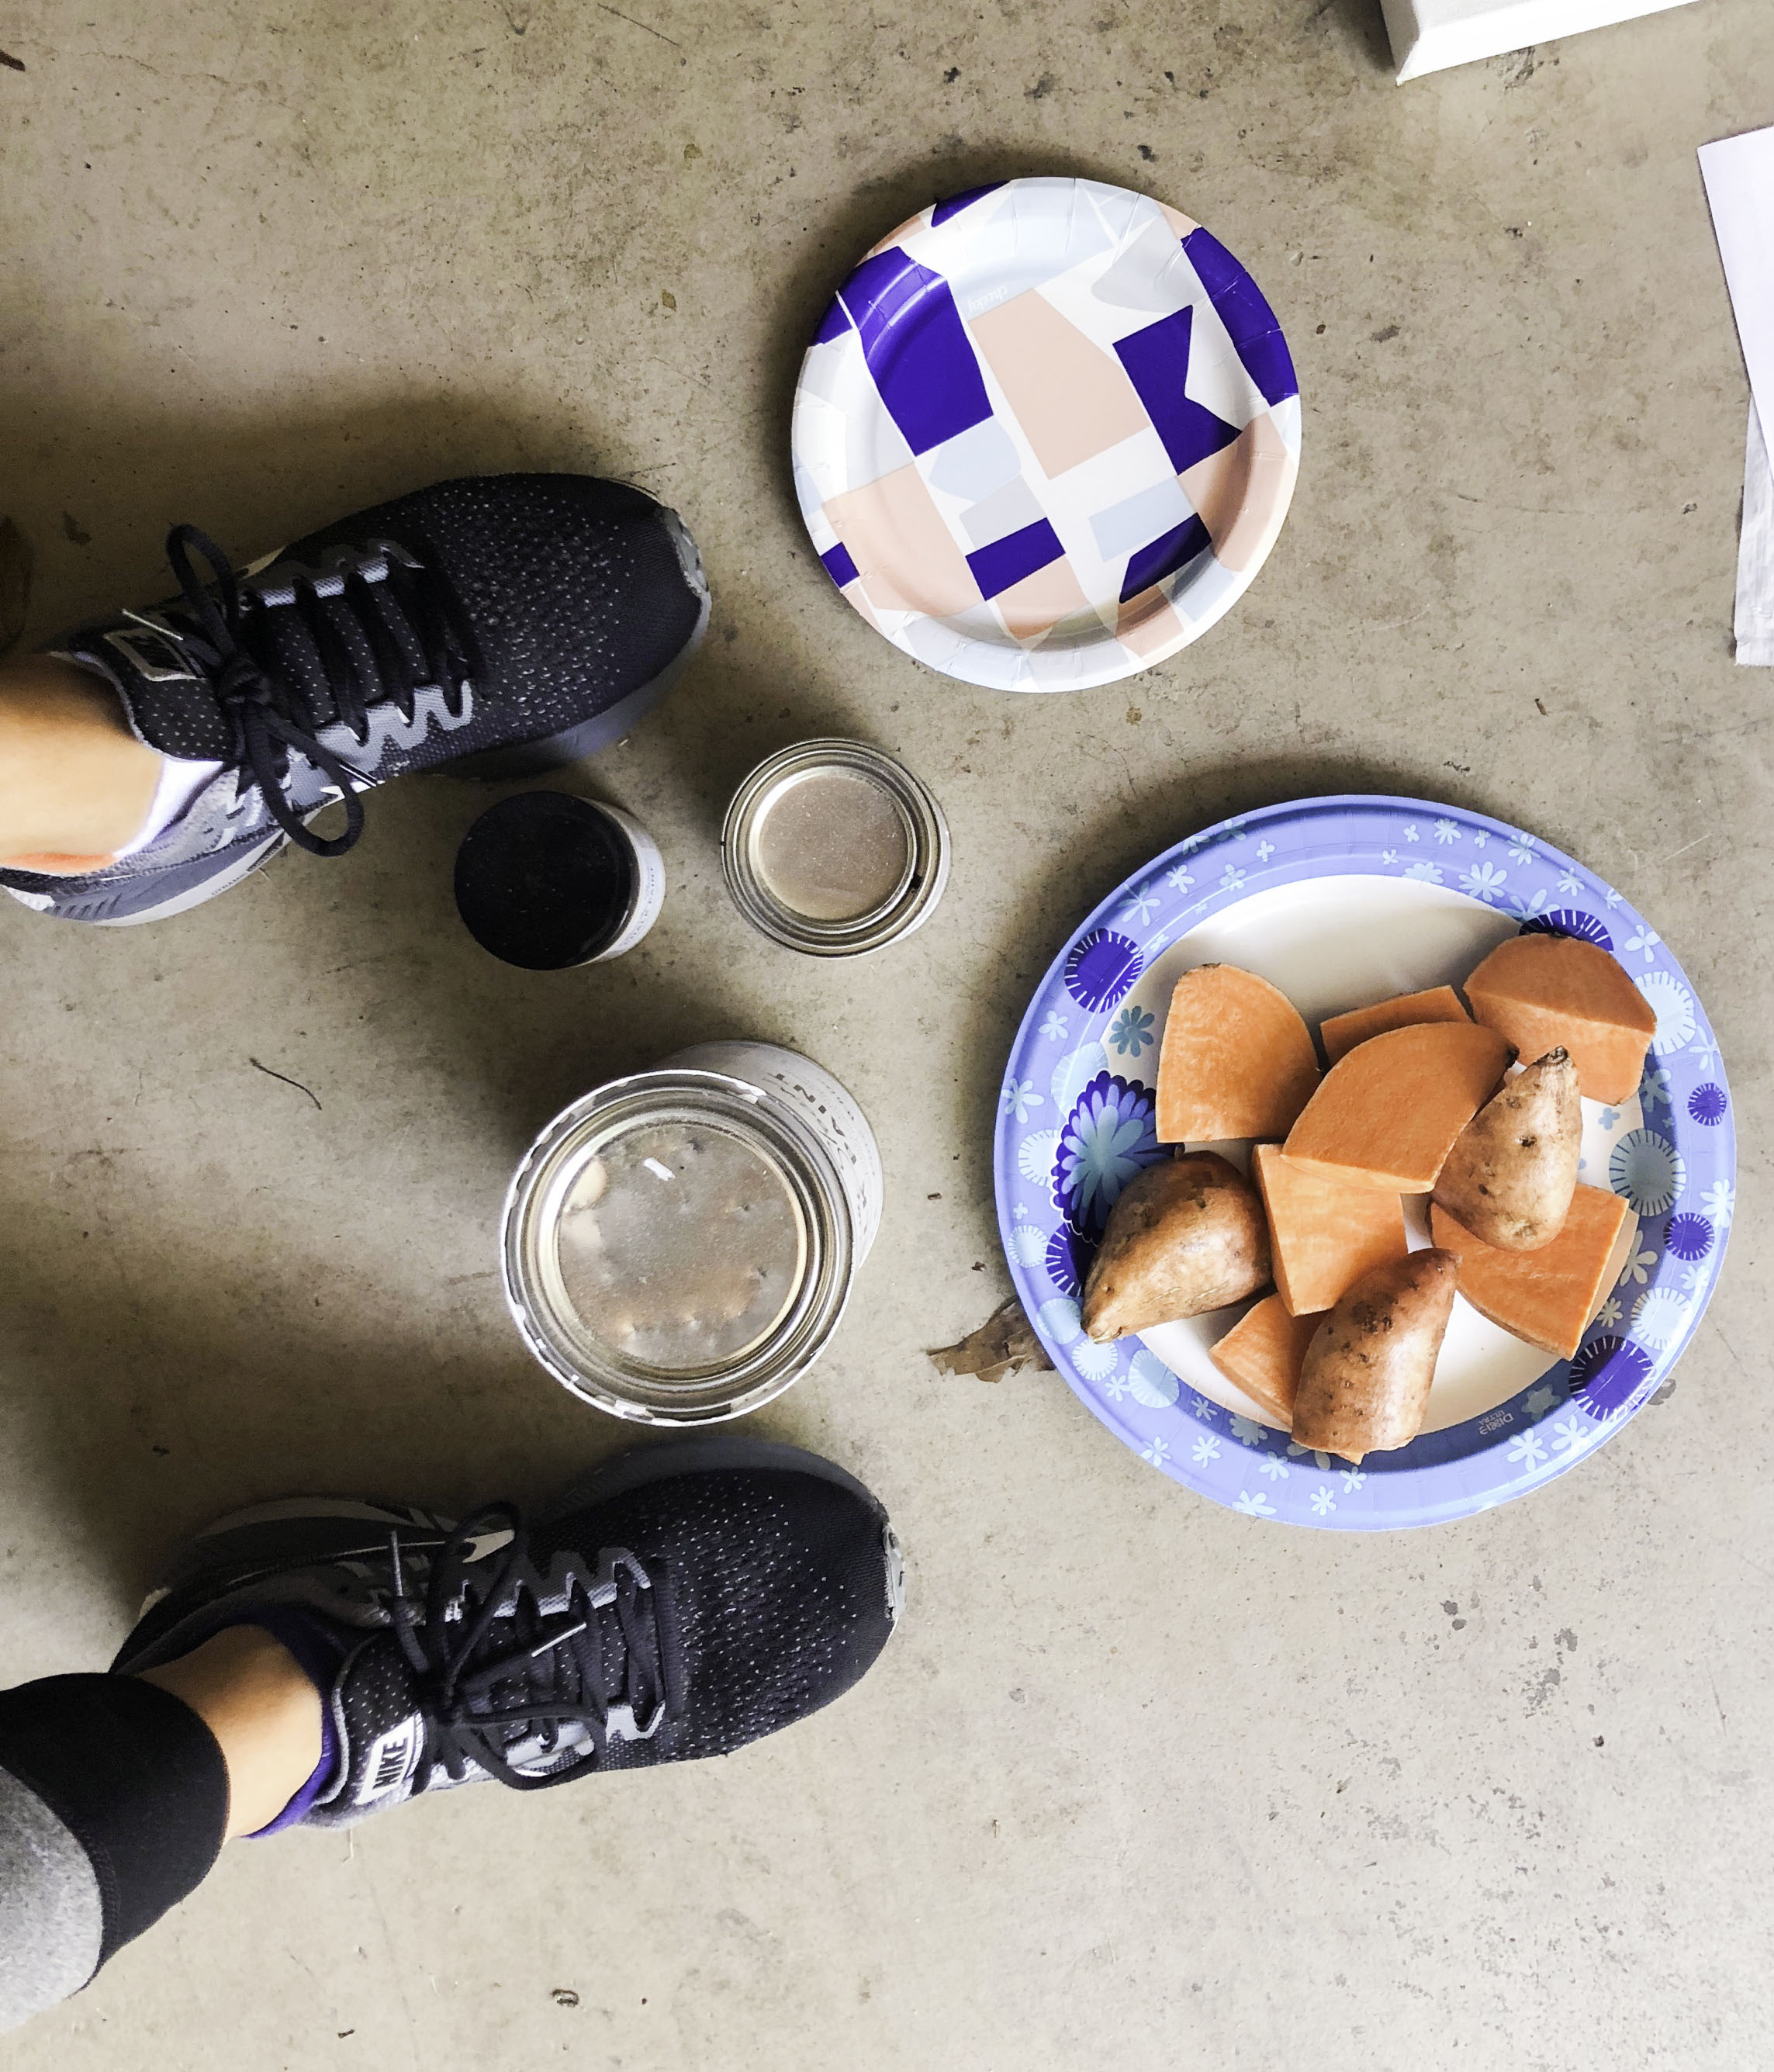
- 3 kinds of paint (or more!) I used Annie Sloan Chalk Paint in Pure White and Old Ochre, along with a simple black acrylic paint simply for mixing and adding depth
* I used the chalk paint because I wanted the crackled texture/effect when the paint dried, but if you are look for more of a smooth texture, definitely stick to an acrylic ;)
- 1 potato (I used a sweet potato!), to be used as the stamp, cut into half-moon shapes (I made about 6-7 stamps)
- a few paper plates for mixing the paint

Method:
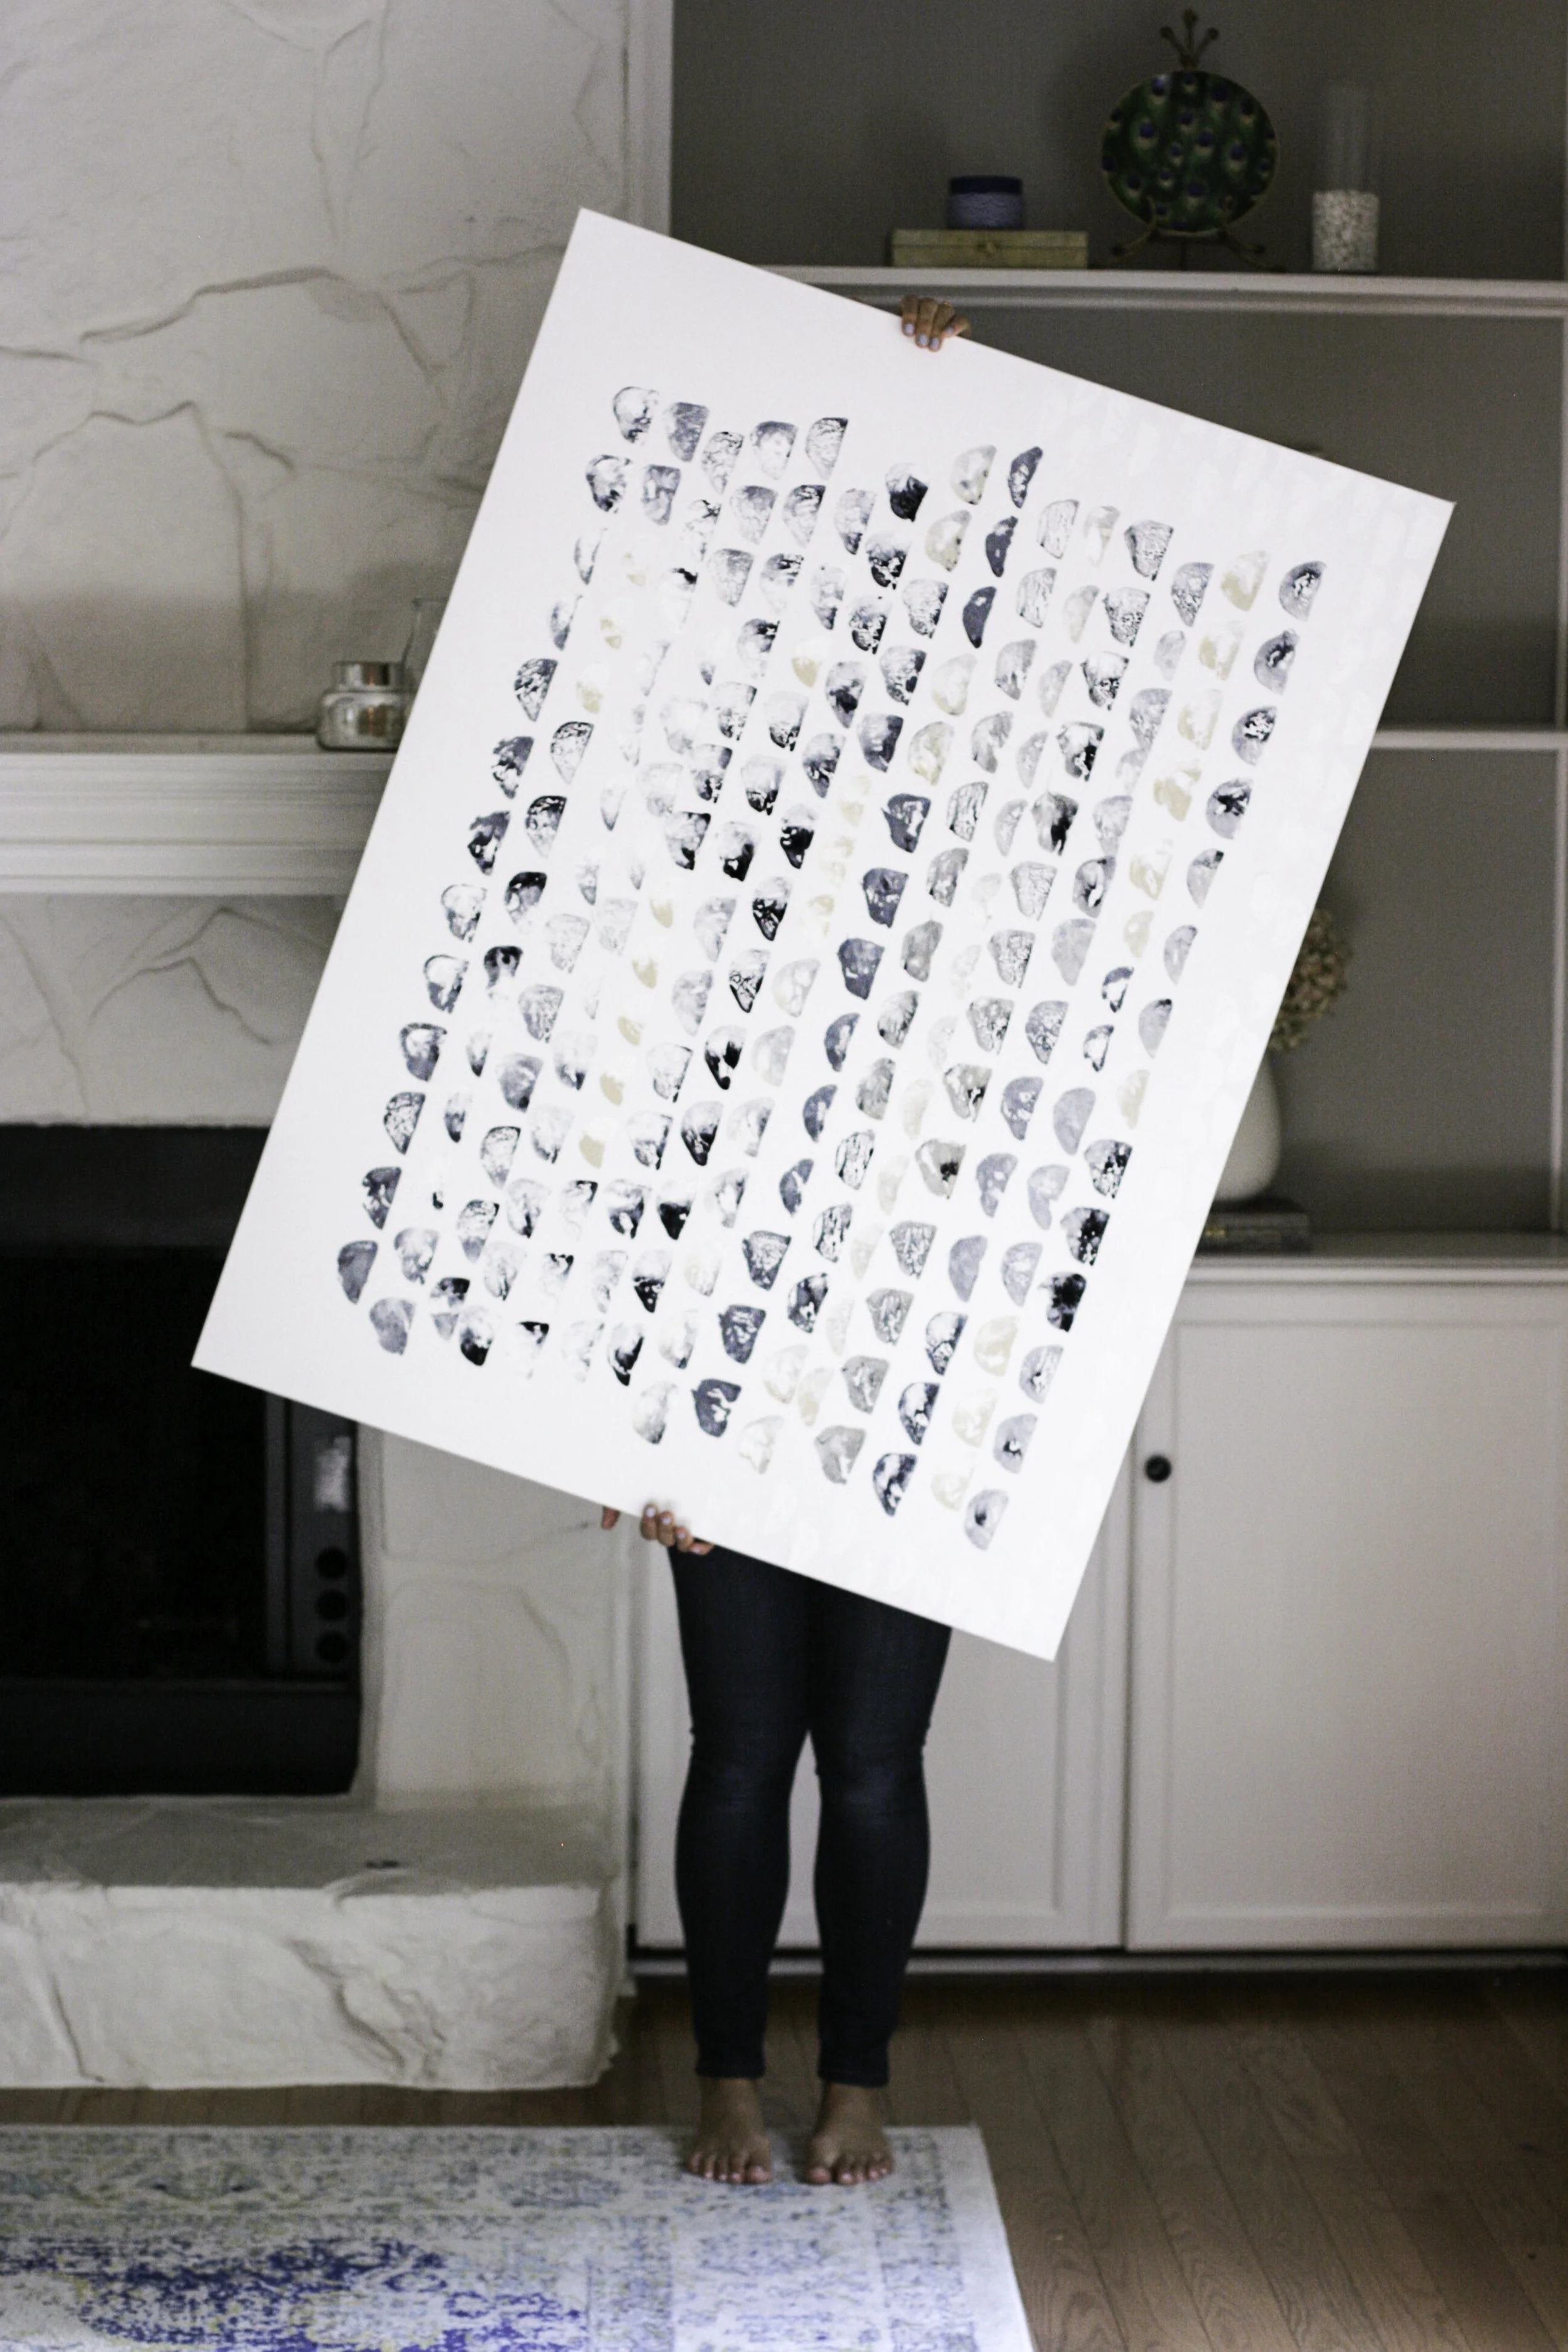
It's really a matter of touch with a piece like this. I used the 3 paint colors and mixed them in 6-7 different ways, then I assigned a different potato "half moon" stamp to each of the paints I mixed up. I am kind of a touch artist, so I don't do a lot of measuring when it comes to something like this, I just feel out the dimensions (this drives my husband crazy but its MY ART). So I eyed the width and length of the canvas and knew that I wanted to keep a thick white border around the paint, and started pressing the stamps (dipped in the paint) a few inches in. I just began pressing the stamps into the canvas, mixing up with paint and shapes with every few presses. I didn't dip each stamp into the paint every single time, because I wanted the effect of some being more bold and some being lighter for contrast.

I continued this process, standing up a lot to make sure my lines were straight (I actually like the bit of wiggle!), and making sure I was mixing up the shape of the half moons consistently.

I also decided to add a pure white "border" on the bottom of the piece, gently working my way up until fading it out at about half way. It's extremely subtle and hard to see in the photos, but I love the effect and it made it feel like "mine" this way.
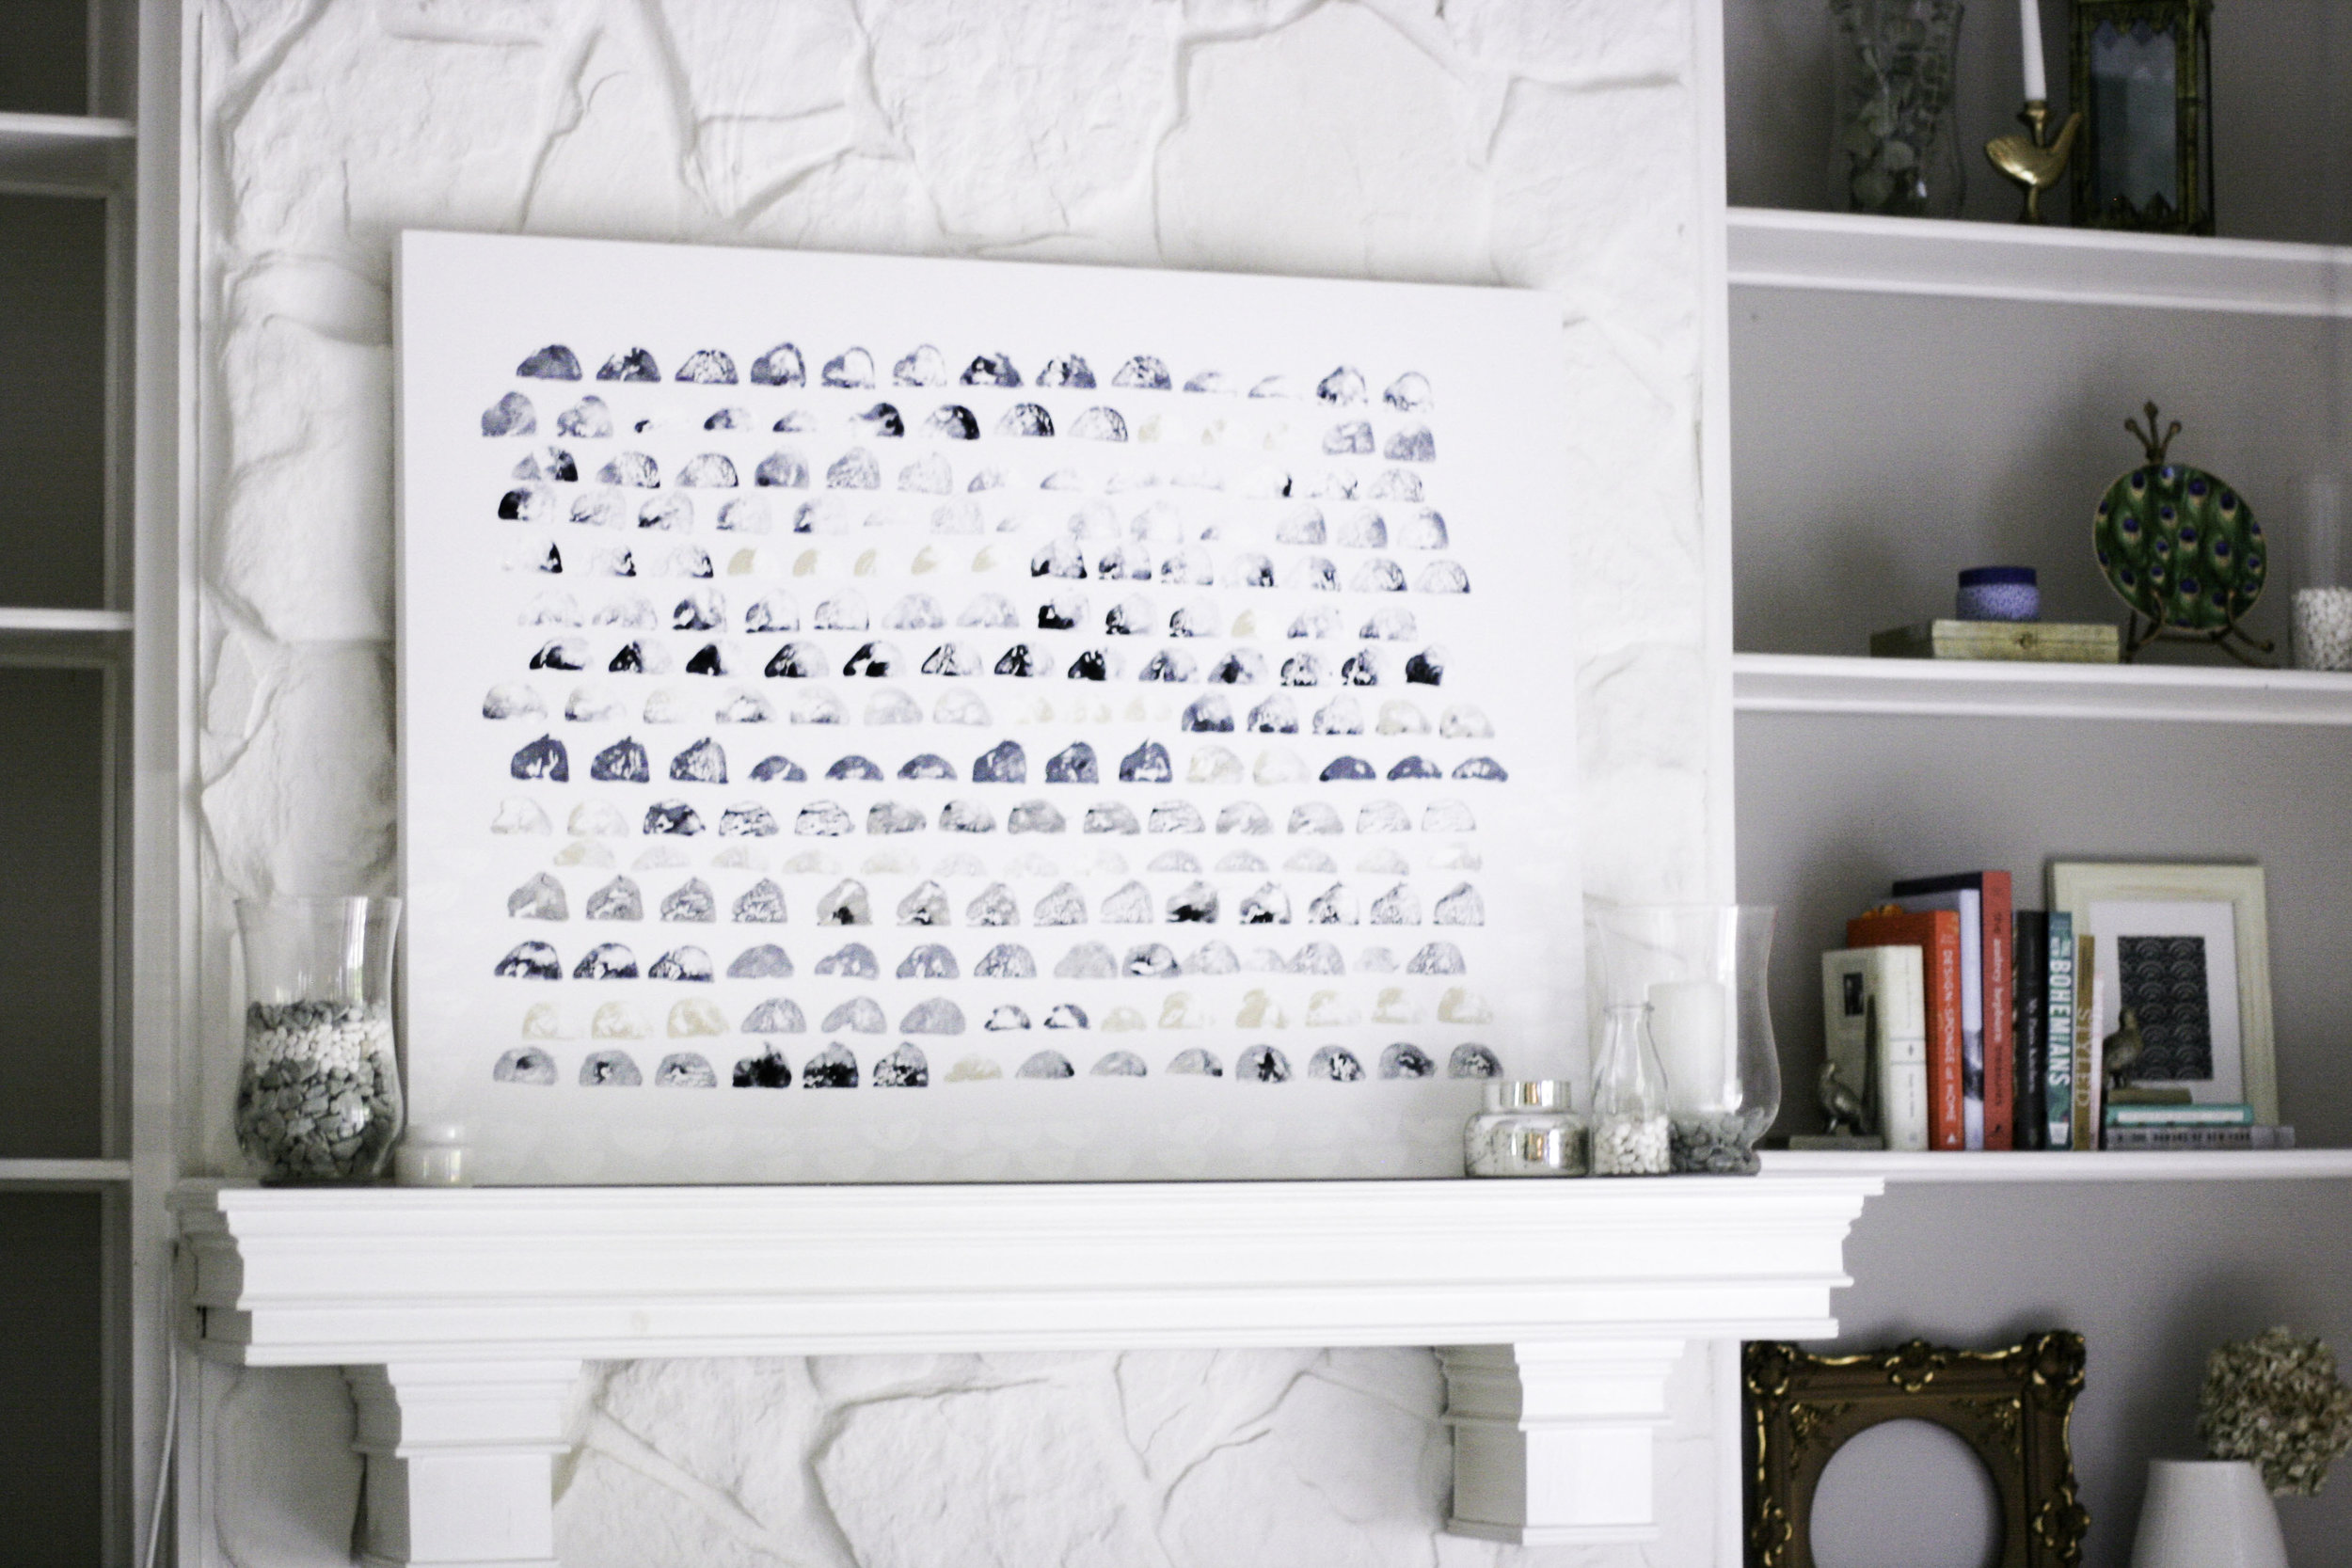
The Result.
This piece was extremely therapeutic for me to make. It was something that was in my heart for a long time, so actually doing it was kind of emotional. Don't laugh, but I actually cried through some of the process. I love how art (and using your hands to create it) can be so helpful in processing what is happening in your life. I personally have had a lot of up and down emotional experiences this summer, and this painting really helped me with some of my coping. And I didn't expect that! So this piece is extra special to me.

I planned for the piece to look more black and white, but the black ended up adding a blueish effect to the white paint. The ochre shade added a sandy tone, and along with the slight movement in the piece, the end work reminds me of the ocean. I love it! And this ended up looking more like the example then I expected! But I absolutely love the result and I am super proud with the uniqueness of this. I've been inspired to do it again, perhaps on a smaller canvas with a yellow/orange vertical style. And maybe using a different medium for the stamp!


Art DIY9.jpg
Art DIY11.jpg

I'd love to hear your thoughts on this DIY! Is this something you would be up for trying? What kind of DIYs are you interested in learning more about? Let me know in the comments below!

Upcycled Buffet Table.

When we moved into our house a little over a year ago, we were given a set of dining room furniture. Yes, given. An entire set of furniture. We were crazy blessed, considering we had no furniture to our name at the time. While the furniture was extremely well-made and in mint condition, it was a little old-fashioned for my taste. Visions of DIY projects filled my dreams, and I had grand plans to flip this furniture and give it a shabby-chic makeover. Little did I factor in the 40+ other home improvement projects, a husband in and out of town with his job, and getting knocked up again into that plan. Those things shifted the priority list, and for over a year I stared at this furniture day in and day out, as it towered over me with its mahogany ferociousness.

It seems like it would have a frenchy accent, right?

I would like to say there's a happy ending to this story, but I'm still mid-story. I managed to finish re-doing the dining room buffet before this little guy arrived, and I am so thrilled with how it turned out. However, I still have a gigantic china cabinet and dining room table to finish... so I'm about 1/3 done with the set. But still! Progress!

Here is the "before":

Here is the piece with 1 coat of paint:

And here is the piece with 2 coats of paint:

And here is the "after":

The Process.
To achieve the antique look, I used Annie Sloan Chalk Paint in Pure White. I applied two coats of the paint, using Purdy 1.5 and 3-inch brushes, letting the coats dry for a few days in between. Using a course grade of sand paper, I sanded the areas I wanted to distress, especially the decorative flourishes in the wood. I wanted those to stand out, so I really went to town on those sections. (If I were doing this project again, I would use an electric sander because this part was very labor-intensive).

Then I used the Minwax Wood Finishing Penetrating Stain in Ebony and gently applied it to the entire piece. I used an extremely minimal amount, and even then, I worked in small sections, applying the stain with an old rag and then immediately wiping it off. I used gloves for this part. I found that using the Annie Sloan Clear Wax to wipe off the stain was the perfect way to minimize the intensity of the stain while still letting the pigment soak into the sanded areas. So I went back and forth with two rags, applying the stain, and then rubbing the stain off with the clear wax. This process was the most artistic part of the whole project, because I could decide how dark/light I wanted the stain to look and soak into the wood. The more stain you use, the more distressed and aged the piece looks. The less stain you use, the brighter the white paint looks. So it's definitely a choice. I spent a lot of time pouring over Pinterest DIY projects (check out my dining room board) to figure out how I wanted my piece to look.

I finished the buffet with another coat of clear wax over the entire piece, to seal everything. Then I spray painted the hardware with Rust-Oleum Metallic spray paint in Oil Rubbed Bronze. Overall, I am super pleased with the buffet and I feel like achieved that french provincial look I was going for.

I chose to keep the top of the buffet the original wood, because there was a decorative feature in the grain that I think is super artistic and beautiful. I think the dark wood on top anchors the piece and keeps it feeling "dressy". I decided to move the furniture out of my dining room because it was simply too crowded in there. Now it lives in the living room, and I use it as a bar when we have guests over.


Project Cost:

Buffet - FREE
Hardware - FREE (kept the old)
Purdy 1 + 1/2-inch Paint Brush - $9.86
Purdy 3-inch Paint Brush - $15.33
Annie Sloan Chalk Paint in Pure White - $34.95
Annie Sloan Clear Wax - $24.95
Minwax Wood Finishing Penetrating Stain in Ebony - $11.00
Rust-Oleum Metallic spray paint in Oil Rubbed Bronze - $7.77

Total Cost: $103.86

I can't give an exact estimate of how long a project like this should take, because I took a month-long trip to New York in between starting and finishing. Oops. Talking about procrastinating. So in theory, this should probably take 5-7 days total, including the drying time, but it took me all summer long to actually get this thing moved back into my home.


Overall, I am really pleased with this furniture makeover. Now I just need to have a paint party to complete the rest of the dining room furniture! Who wants to come over?? I'll buy the pizza and brew ;)

P.S. - When I painted my son's toy cabinet emerald green, and if you're up for braving it, how to make your own chalk paint.